Wednesday, July 9, 2014

Climbing on Netflix — 180º South

180º South is a great documentary that is available on Netflix. It follows one man's dirtbag climbing/ adventure lifestyle as he heads to Patagonia to climb.

If you are like me, you have done internet searches for feature rock climbing films. What you mostly find though is alpine movies about deaths in the Himalayas. In searching I found 180º South and have watched it multiple times.

This film takes you on a journey that you might not have expected as social vs industrial issues arise about the consumer society that the world has become. This film reminds us that we can't just continue to take from the land and not give anything back. As climbers we understand the beauty of the outdoors and that it must be protected so that people to come can have the same experience that we had.

Well, if you are looking for a film to watch check out 180º South available on Netflix.


Friday, July 4, 2014

7-4 Friday Knot for Thought — The Barrel Knot

This week I decided to do the Barrel Knot. This knot is important to know so that you can keep yourself safe when rappelling off multi pitch routes where you'll be maxing out the rope to get to anchors. Also this knot is good to throw on at the end of a rope when belaying someone.

I am really excited for this week though because it is the first week that I have been able to make a video demonstration for the knot. Let me know what you think about the video. I am also looking to show the knots in use in later videos. Enjoy.

Thursday, July 3, 2014

Update and Climbing at the American River

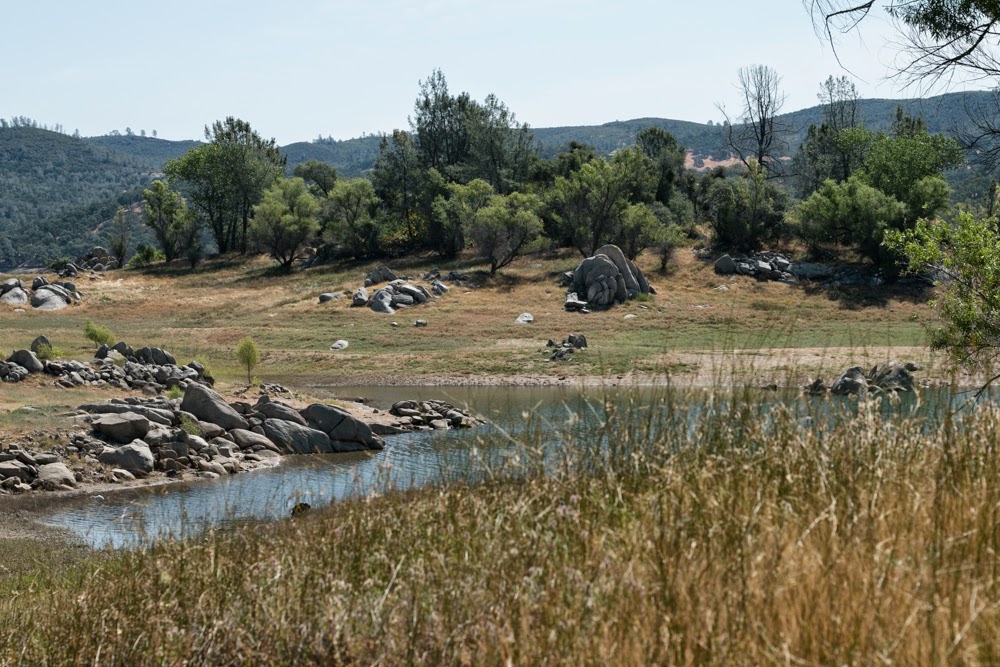
Hello everyone. It feels like I was gone for a long time. I was just on a trip to the American River near Sacramento for the last couple of days so there was no post Monday, Tuesday or Wednesday.

Anyways I got to climb some fun stuff and went white water rafting. All the climbs were top roped which was fine with me since the area where we climbed was a huge ledge with quite a distance to the river. So we kept things safe.

The area was called Billy Goat and offered a bunch of simple fun routes. I think the hardest was a 5.10b, 6A.

The first climb I did was up the side of a large flake of the rock 6 meters to a finger crack that went three meters to the top. This route was called ant hill and was 5.7, 4, I think. Easy, Fast and fun.

Next I climbed the route called Chimney. Which you could chimney up or climb the face which was slightly more challenging. I would grade it 5.8, 5A. There were really nice hand holds at the start that led to a slightly right angled crack. Once you were up the crack, then you had to get on top of a thick small flake. The flake was like the head of a hammer and I had to reach to get a sketchy hand jam and toe jam to get on top. Which was the definite crux of the problem.

The next two climbs were my favorite of the time there. They were both challenging and I'll save the best for last.

The first climb had three different ways that you could start the climb. Two of the ways made it 5.9+, 5B/C. The first way I started it was hugging a small section of the rock to get to a perched boulder. Once on top of the boulder you can make a lunge move to a knob on the face around the corner. This was an easier way but there was my way which was straight up.

Going straight up was definitely worth it. There was friction for feet to get the undercling after stemming the corner. When you got to the edge there was the possibility for a small toe jam and fist jam to get past the crux section. Then it was a smooth walk up to the anchor in a sense.

The other way to do this same climb was to follow the face on the arete which had a small selection of spread out small, sloped knobs for hands and feet. I think in total there were five over the 10 meter climb.

The final climb that I did was a finger crack. It started with a beautiful thin flake and then went into the crack system. There weren't any great foot options and I tried to get some type of edge on the crack mostly using just friction. At the crux before an easier top out there was a shear smooth spot that went from fingers to a meter of fist crack with no feet. This was definitely a fun crack climb.

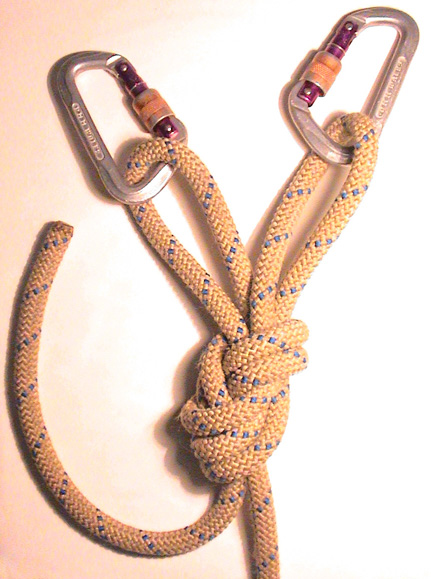
So that has been the last couple of days. I'm excited to be back and had tons of fun in the end. Also, I am announcing that I will be working on videos that show how to tie and use knots so that they can be on here for the Friday Knot for Thought. So hopefully I can start that for tomorrow's knot and if "knot" (not), I will have it for sure next friday. I hope that all of you are having climbing adventures of your own. Let me know what you have been up to. It would be great to know and share.

—Keep Climbing!—


Friday, June 27, 2014

Friday Knot for Thought — Clove Hitch

So with this recent talk about anchors and trad climbing I thought that this week's Friday Knot for Thought should be the Clove Hitch. 

If you watched the video on the three-point rope anchor, the person in the video was using this knot to secure the strands of rope. This knot is very secure, easy to tie and easy to adjust. A need to know knot for all climbers.

To the right is two ways to tie a clove hitch. The method on the bottom is what climbers want to use since on multi pitch routes we stay tied in.

Here is a link to a video that Climber magazine did on tying this knot.

Wednesday, June 25, 2014

The Basic Three-Point Anchor

Making a three-point anchor can be done in a couple different ways. As seen to the right, you can take a cordelette with a double fisherman's and clip it through three points to create an equalized anchor.

To finish the anchor you can tie a simple over hand knot but a figure eight on a bight is the best.


There is another way to tie a three-point anchor that I found while watching YouTube videos. While on lead on a multi pitch route you can use the climbing rope for the anchor.

Here is the video link: Rope 3-point Anchor

With either style of anchor you can simply use the ATC guide in guide mode so you can belay the person from the anchor. Or you can tie a redirect, which is shown in the second half of the video, if you want to belay off of your harness.

Tuesday, June 24, 2014

Claymation Short Film

This is a video that I put together yesterday cause I had some free time and I love my Mad Rock Phoenix climbing shoes. So I hope that you enjoy. Follow the link to watch the video.
Mad Rock Phoenix Claymation


Monday, June 23, 2014

Big Rock Lake Perris Climb

On Thursday I got the chance to go climb outside and my mom decided that she would like to go to Lake Perris where we had gone once before. I was eager to test my new Mad Rock Phoenix climbing shoes and this would be a good place for that.

Big Rock is a large wall of granite that is a couple degrees off vertical. It is all slab climbing and you pretty much just rely on friction to keep you on the rock.

So I got there and threw my shoes on. I was so happy with how sticky they were. It almost felt like I was spiderman. Just traversing to where I thought was a good place to climb was fun and I wanted to get on the rock.

One thing about this sport climbing is that the easier routes are super run out and the harder routes have bolts on each side of really hard parts. Well I decided to go up this one route that seemed pretty easy; a pure on-sight attempt. This route had a couple of bolts in the first 30ft, 10 meters, so I thought it would be a good idea.

I started up the route and quickly get up to the first bolt about 15ft, 5 meters, up the route and I was feeling okay. But right after that bolt the next couple meters to the second bolt was vertical and smooth. I had no hand placements and just friction as my friend.

Each step was crazy and I should have gone faster thinking back but my friend friction let me down. My feet separated from the rock and there was no recovering from it. Everything slowly sped up until I finally processed that I was falling. I watched the first bolt go by hoping that I would stop soon. What seemed like a minute later I finally stopped as I saw my mom right by my feet with the rope locked off.

I had fallen nearly 26 ft. And was a meter above the deck when I came to rest. Unfortunately I landed badly on my right ankle and tweaked it; later that day I was barely able to walk on it. I wasn't in a shape to climb the rest of the day so I went over to a couple boulders and messed around before leaving the crag.

Before I left, I figured out the problem that had occurred from the start. The original line that I wanted to climb was to the right of the one that I did climb. They both had two bolts low on the climb but one was easier.

So the moral of this story is to make sure that you climb the route you plan on climbing. I didm't think and started up what was in front of me.

Saturday, June 21, 2014

Reel Rock Film Tour 9

Here is a trailer for one of the short films that will be in this years Reel Rock Film Tour 9. I love the history of climbing cause it seems to be something that we don't always here a lot about when we first start climbing or have been climbing for many years. Also its cool to see those who paved the way for todays climbing. 


Check it out: Valley Uprising


Friday, June 20, 2014

Belay Jackets

During my climbing trip in the Black Hills I ran into high winds at the crag that made it cold to climb. Now I've been looking at what there is in the way of lightweight packable warmth for the everyday climber.

So what do you want in a jacket for wearing at the crag? A hard shell jacket is great for rain or snow but I never climb in the rain or snow. Also I already have a couple of rain jackets. What I want is wind resistance and warmth and for that I really look at the nano puff jacket with down or synthetic fill.

North Face Verto Micro Hoodie
The North Face has many great jackets that can be pricey. If I had the money to spend on it I would get the Verto Micro Hoodie which runs $250 on their website. A less expensive North Face option is the DNP Hoodie which retails at $180, and both jackets look nearly identical.

Patagonia also has many great options which can be found but are even pricier. The Nano Puff Hoody ($250) and the Ultralight Down Hoody ($350) are super warm and comfortable but if you want a Patagonia jacket for less you'll have to go without a hood.
Mont Bell Thermawrap Pro

I know that I want a hood. Even though I don't always use one, it is nice to have when it is blasting cold winds outside and you need extra protection and warmth.

Mont Bell has slightly cheaper hooded down jacket options with the Thermawrap Pro ($175). It is synthetically filled. I think this is a great option but if you want to spend a couple dollars more you can buy the North Face DNP Hoodie.

Here is a review by Outdoor Gear Lab on down jackets for 2013
OGL Jacket Review

6-20 Friday Knot for Thought

What would you do with a Double Fisherman's knot?

So this weeks Knot for Thought is the Fisherman's knot as it is useful when you are connecting cordelette, or a stopper knot in the end of your rope on a big wall, or to make your followthrough figure eight more secure if you leave a long tail.

So here is an interesting short video on how to tie it 

Essentially you are looping one end around the other side of the rope back on itself. Then pass the end through the loops created and repeat on the other end.

Simple and useful knot to know. 

Wednesday, June 18, 2014

Building your Trad Rack

When getting into traditional climbing you really find where this sport gets expensive. As it is I am still building a full trad rack and pick cams, hexes and nuts up when I can. After reading an article on Rock and Ice magazine's website about trad gear I would have to agree that you should buy as much gear as possible so that you can place pro whenever you can.

But if you are like me you don't have much money and still want to climb fun and challenging routes. So what would be a minimalist rack?

Nuts
If you like to climb on the wild side you can always just invest in nuts. Get a set of Black diamond stoppers size 1-13 for $115 or 4-13 for about $90. I am sure that you can get away with 4-13. I was recommended by a friend to pick up a set of DMM offset nuts which I haven't tried out but they look to be a great addition to any rack. 


Cams
You can buy all kinds of cams from tiny aliens to massive off width crack cams. But for most cracks you can get away with .5, .75, 1, 2, and 3 sizes of Black Diamond Camalots or similar sizes from other brands will work. 

Runners and Beaners
You will want to have quick draws to clip while leading otherwise protection is pointless of course. But it is best to have non locking beaners on nylon runners so that a fall is less likely to pull out your pro. These can also be called alpine draws when put together a certain way.


Recap:
So if you want a minimalist or starter rack go with:
  • size 4-13 stoppers
  • .5-3 Cams
  • at least five sets of nylon runner draws

Tuesday, June 17, 2014

Indoor Rock Climbing

Indoor rock climbing can be fun, challenging and a great workout. I started with outdoor climbing and have found that I'm in the climbing gym more than I am outside. Mainly this is because I don't have a climbing partner most of the time. But I definitely prefer to climb outdoor because the scenery is incredible and I feel like it can be a little easier and more enjoyable.
Indoor climbing places are convenient. It seems like more and more places are sprouting up across the United States and that with the health and fitness craze that is going on that more people are getting into the sport of climbing.

Going to school in South Dakota there is great climbing on the western side of the state but an extreme lack of climbing on the east side of the state where my college is. So indoor climbing is a must and it is warm when it gets bellow zero in winter.

Repeatability with diversity I think is the best thing that indoor climbing offers. You can work some technique while building strength. Anyone who has climbed both indoors and outdoors knows that there is a big difference between the fake textured walls with bolted holds and the natural walls of the outdoors. 

There are definitely those people who go to a gym and climb super hard and climb things that seem like it would only be possible with spider powers. And then there are those guys who live at the crag and seem to be part of the wall; as you are struggling up a slick face this guy is just free soloing the wall and makes his way over to tell you some quick beta and then disappears up the rock.

These two types of climbers are very interesting and there is definitely a vast middle ground. I enjoy climbing and having fun just going up something no matter the difficulty. I don't have to kill myself in the gym or crush myself on the rock. So when I'm in the gym it's really about doing something that is fun which is really what climbing is all about. 

This is why when I set routes they are usually easier, but they are always enjoyable and even those who climb 5.13 say that this 5.9 is fun. 

I hope that I didn't bash indoor climbing in this post. It is great to just drive to a place, park, walk in and climb some routes. 

So what do you like about either type of climbing? Where is your favorite place to go climb? 

Monday, June 16, 2014

Climbing Anchors Book Review

Last week I bought the book Climbing Anchors by John Long and Bob Gaines for $17 from my local climbing store. I have climbed for a long time but I've always winged it when it came to anchoring a climb. I never gave much thought as to what I was clipping a quick draw into or the boulder that I was slinging. Now after reading this book I have a greater appreciation and understanding of what goes into making a secure climb.

Boiling it all down, theres not full proof way to make a climb 100 percent safe. But there are measures that you can take and basic knowledge that every climber should have that this book explores. This book gives insight into the history of climbing protection and anchor building with some nail biting stories from the authors giving testament to these techniques. 

Climbing safe is about knowledge and experience and this book would be a great buy if you are looking to grow your knowledge base on anchors. Anchors include: bolted anchors, cams or friends, nuts, slinging boulders and more. 

I will be sharing some things that I found to be basic common things over the next couple of weeks. The theme will be Safe and Smart. 

Friday, June 13, 2014

Mt. Rushmore Part 2

My Computer is ALIVE!!
Here are photos and some more of the story.

 This was about 50 ft up on a little free solo I did the first night that I arrived at the Wrinkled Rock campground. It was a good thing that I did this cause it got my body ready to climb and it was good release from the 5 hour drive that day.

And of course I got ready with a chalk bag and shoes.


The next morning was when we left from this amazing view to drive to Custer State Park and climb the spires.


 (right) This was starting view that we had on the beginning of the trail from the parking lot.


(bellow) After about 10 minutes of hiking on the approach I was rewarded with this inspiring view of where we would be that day.


Here we broke off from the main trail on the lightly worn approach trail that showed the path that other climbers had walked before us.


(bellow) When we finished the approach we came to this little outcrop area with amazing view and out of this world features that made me feel like I was in the Lord of the Rings.


This was the second belay station which we used as the first belay station.


The view down the gully showing where we started to the second belay station.


It was Saturday so we took a Saturday summit selfie


Belaying Emily up the second pitch using the ATC in guide mode.


This was an entertaining note that I found in the register that was on the summit. It reads, "Gervase and Lev. Avg. age 75. Two old guys at the top of the hill — on a rope." I thought it was worth taking a picture.


 This was the second panoramic picture that I took at the summit with my phone. I have blown it up on a TV and zoomed in and it captured amazing detail of the surroundings


So this was one thing that I didn't mention in my story post a week ago. It was extremely windy when we were at the summit because the rocks created a funnel effect, and it was cold. A member of our group was climbing Station 13 and decided to bale but most of his gear was still in the rock face. So this is me and Jay waiting, watching and talking to the others in the group during the gear rescue.


6-13 Friday Knot for Thought

The Prusik Knot

I love this knot because it has so many possible uses and was fun to play around with when I was first learning to use it. The first use that I've used it for is to ascend a rope into the tree in my front yard and is most common reason to use it, in my opinion at least. While climbing Spire 2 a member of my party used it on the tail end of the rope below his ATC when we were rappelling from the summit; a cool way to make an auto locking rappel if anything were to go wrong.

I've used it to have a loop to hang bags or a bottle from on a rope so that I didn't have to hold it. Really this knot or, if you want to be technical, hitch is a must know for emergency situations and can just be fun if you don't have money to buy ascenders.

Thursday, June 12, 2014

6-12 update

Really excited for this next week since I am back home in SoCal for the summer and my mother will be starting her summer vacation at the end of tomorrow. This means that I will have someone who is willing to come with me on adventures with me and we can go climb in the riverside quary like we did last summer.

Also my Mac should be finished being repaired on Monday or Tuesday. Which means I can upload photos from my climb in the Black Hills.

I am also excited for getting to share another knot with you tomorrow. I'll give you a hint...
"Going up"

As always, Keep climbing!

Friday, June 6, 2014

Friday Knot for Thought 6-6-14

So I thought that it would be good to post the basic knot that everyone knows with some variations of it that are useful when climbing.

The Followthrough Figure Eight

Followthrough Figure eight and some more knots


On a Bite


(The link above)


I used to use this knot when I would rappel out of the tree in my front yard after setting up an anchor. The nice thing about this knot is that you can put it anywhere you can double up the rope.


Followthrough Figure 8 on a bite with 2 Ears
The double figure eight, also known as the "Bunny Ears", is handy when equalising two anchors using the rope. Many top ropers are fond of this knot. The "ears" can be elongated or shrunk with a little adjustment making equalisation of the load fairly simple. Follow these steps to tie the double figure eight:
Bunny Ears, Step 1Bunny Ears, Step 2Bunny Ears, Step 3Step 1: Start with a figure eight on a bite in the end of the rope. Use a generous bite, way more than pictured, leaving a large loop sticking out the top. Step2: Feed this large loop back into the figure eight.Steps 3, 4 & 5: Continue feeding the large loop through. Not too much though, so as to leave the twin "ears" behind. Now tuck the large loop upwards, under the knot and finally over and around the twin "ears".
Bunny Ears, Step 4Bunny Ears, Step 5Bunny Ears, Step 6Steps 6 & 7: Pull the "ears" tight, and clip each on to your anchors. You can now adjust the tension, equalising the anchors by elongating one ear, and thus shrinking the other ear.
Bunny Ears, Step 7

(From chockstone.org)

Summer 2014

I'm finally home after 2182 miles of driving, three nights of camping, sleeping at rest stops in the back of my car and a great week with my wonderful grandparents in Sacramento. And of course some great climbing adventures.

I started this trip in Vermillion, SD where school is done for the 2013-14 year and will pick up again in the fall. So I thought to myself, "It would be nice to climb behind Mt. Rushmore again." So that went on my list of destinations. Next I knew that it would be a treat to go by my grandparents house in Sacramento, CA so that went on the list. The nice thing was that I have a guide book for Southern Lake Tahoe. So I could stop by there and climb on my way.

So I started my trip and went to the Black Hills in South Dakota on the eastern side of the state. I stopped at Wrinkled Rock Climbing campground since I could camp there for free. Since it was memorial day weekend there were a couple of groups of climbers there and I made friends with a large group of 10 climbers from Minnesota who were on a annual climbing trip.

The next day we woke up with the sun because the forecast called for rain in the afternoon. We decided to go to Custer State Park and climb the Cathedral Spires. After getting a pass at the main lodge we went a couple miles into the park past Sylvan Lake and parked in a small parking lot at the start of the approach.

It wasn't too much of a hike in and the scenery was great. We finished our approach when we got to this spot between Spire 2 and Spire 3 and 4.

There were four of us including myself that went to climb Spire 2's Jan/Jane route. Being the first time doing a multi pitch route and trad climbing I was a bit nervous but had more excitement than anything else. My climbing partner Dave Sandel, from Colorado, led the way on the route on the left of the arête. Later I found out that dave free climbed the first pitch because he couldn't find anywhere to place pro. But after that he continued to the second anchor and placed some gear.

I started quickly up the route which is rated around 5.7. Not difficult by any means so it was just fun and enjoyable. For being a 250 ft route it didn't feel like you were that high because the exposer was very minimal.

When our second group summited, we did a two rope rappel after signing the register. We planned on doing Spire 4 but a line had formed with other climbers on route and by the time we were going to make an ascent a storm rolled in so we had to leave.

Being at the summit of spire 2 was wonderful and I will post the pictures that I took when I get my laptop back from being repaired at Apple.

But in the mean time I will be posting from my tablet. And if you are out in the black hills, a great day of climbing can be found at the Cathedral Spires.

Friday, May 30, 2014

Friday Knot for Thought

I want to try this out. Each week I will post a knot that every climber should know. Whether that knot is for climbing or just a must know outdoor knot. I would love to hear feedback from you about what knots you would like to know or what knots you find most useful when out climbing.

So here is one of the first knots that I learned for climbing and helps when connecting two pieces or tying off a piece of webbing.

The Water Knot
— easy, basic

Essentially if you think of tying an overhand knot in the one piece of webbing and then take the other piece and like a follow-through figure eight you will have a water knot.
Getting the knot untied can be a challenge if it has been stressed or tightened down a lot. But taking hold of the tails of each piece of webbing and pushing up and in on both sides can release the knot.

Hope you enjoy, and keep climbing!

Tape Glove

So if you are wondering how to make a tape glove here is a link to two sites that I follow:

The One time glove design that they have here holds up very well on long climbs and I will be looking to test it more in a couple weeks when I meet up with my friend Tane to climb in Needles, CA.

The Reusable Tape Glove is one thing that I tested out at my home last summer and found that it was fairly useful and worked well.

While I was climbing the boulders at Folsom Lake I just used one layer of tape and really just laid the tape on the back of my hand so that it didn't get cut by the rock.

Hope you enjoy, and keep climbing!

Folsom Lake Bouldering

     Had some fun bouldering in Folsom Lake Recreation Area, CA. I was surprised at how many boulders I actually found to climb. Overall I thought that this was a lot of fun.

Although, it is not a mecca of bouldering by any means, there were three boulders that I found to have some good crack climbing training to work finger jams and hand jams each about V2-V3; so not too difficult.

     So the actual place where I went is called Beeks Bight. There is a parking lot that puts you right by the boulders. Mountain Project doesn't have to much on this place so I may have to make a map and post some more photos because I found more routes than they had.

 This was the first boulder that I climbed and it had some great finger cracks. As you may see in the picture to the right, the middle crack doesn't go completely to the top which adds some fun to this problem.

I found that there were multiple ways to start this main problem. Each way was fairly straight forward with little power needed in order to pull yourself up off the ground.

When I exhausted the main crack I moved to using the crack on the right to tech the top. Friction was my best friend on this problem since there wasn't a lot of options for feet because the crack was quite small.

The second problem that I did on this boulder was on the left side of the face in the crack formed between the main rock and the broken off piece.

From a sit start, an un comfortable fist jam above the small overhang allows you to place your feet to grab the edge before you traverse to the top.

When you get near the top the boulder becomes a sloping side pull with sketchy tips cracks for your right hand with little feet.

I loved these routes cause they weren't too challenging but got the adrenaline pumping so I had to do each one twice.

I would strongly recommend a crash pad or two if you are going to climb here. This way you can cover up a lot of the rocks that are at the base of the problems in case of a fall.

This was the definition of a hand crack boulder problem. I had to tape up for this one. This crack was raw with some sharp edges but fun.

There was a good technique work on this crack for me cause I typically climb finger size cracks and haven't had the opportunity to try various hand crack techniques outside the gym.


— Keep climbing! —